Ask in plain language
No query syntax. Ask a question and ChatGPT selects the relevant Dataline data tool.
Connect Dataline once, then ask natural-language questions about markets, onchain activity, projects, news, and prediction markets—all through a read-only data connection.
See the connector configuration, authorization flow, and first data question from start to finish.
No query syntax. Ask a question and ChatGPT selects the relevant Dataline data tool.
Use returned context and source references to understand where an answer came from.
The skill retrieves data only. It does not trade, sign, submit, or automatically execute actions.
Follow the current ChatGPT connector flow below. The interface can vary slightly by plan or rollout.
Open ChatGPT settings
Use ChatGPT on the web, open your profile menu, and select Settings.
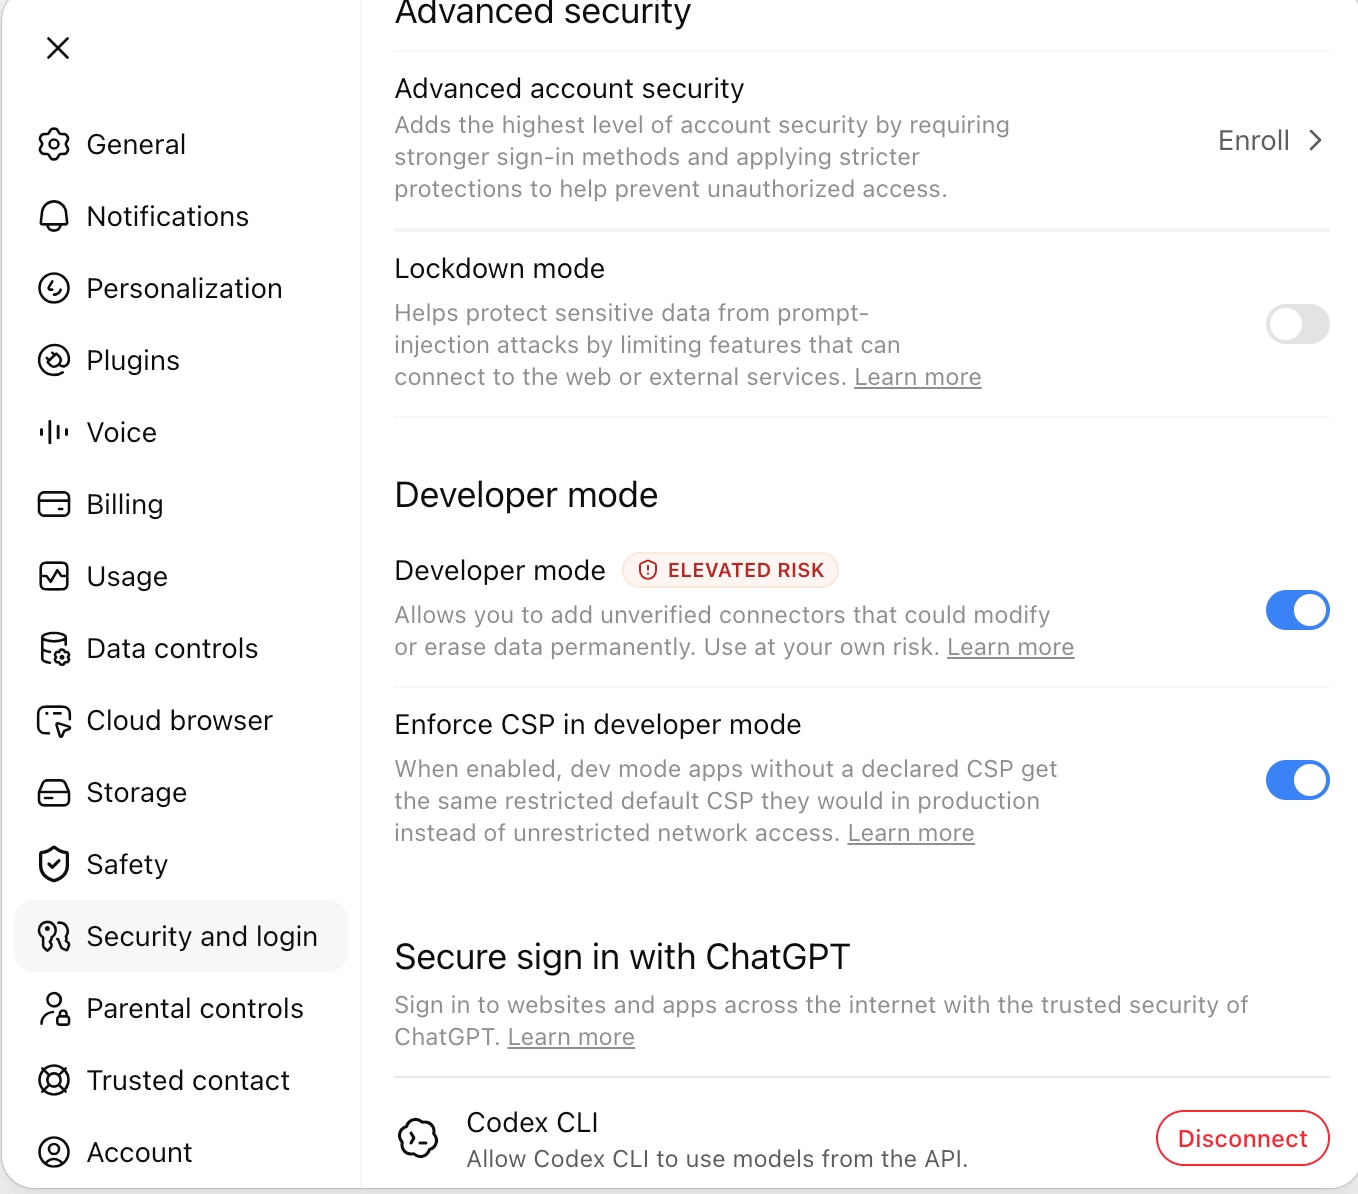
Enable developer mode
Open Security and login, find Developer mode, and enable it. ChatGPT shows a general warning for custom connectors; Dataline requests read-only data access.
Add the Dataline connector
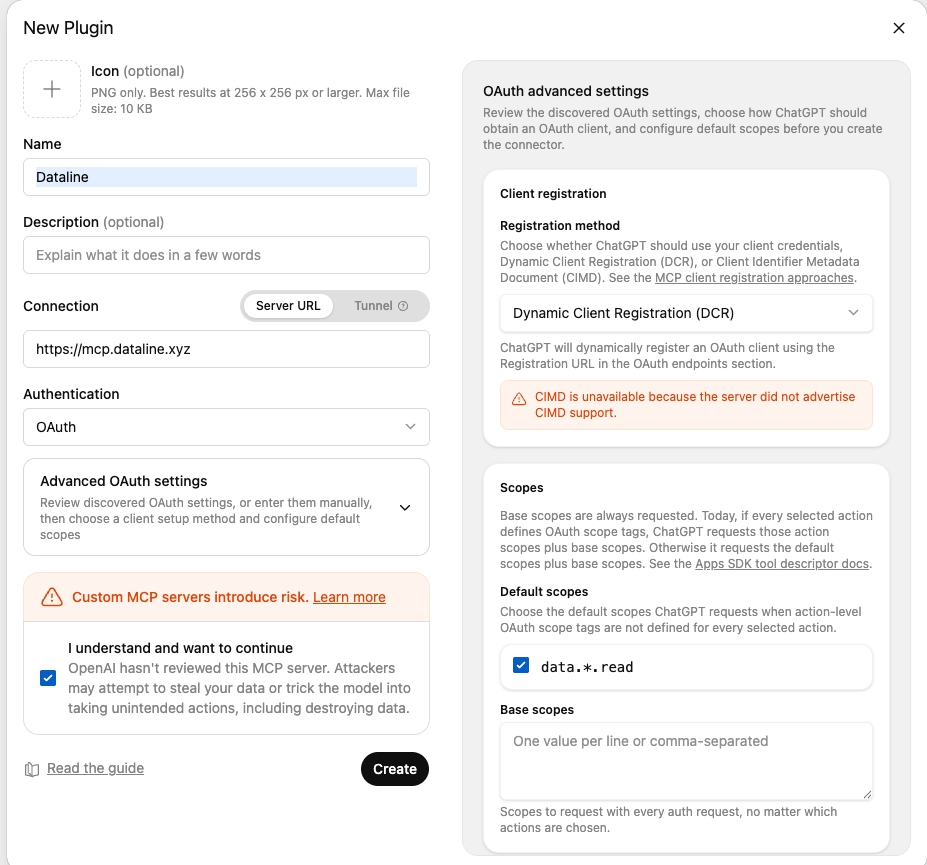
Open Plugins, select the add button, and create a new plugin. Set the name to Dataline, choose Server URL, enter the endpoint below, and set Authentication to OAuth. In OAuth advanced settings, keep Dynamic Client Registration (DCR), add data.*.read as the default scope, confirm the custom MCP notice, and select Create.
https://mcp.dataline.xyzThe screenshot may show the host without its path. Use the complete endpoint above, including /mcp.
Complete authorization
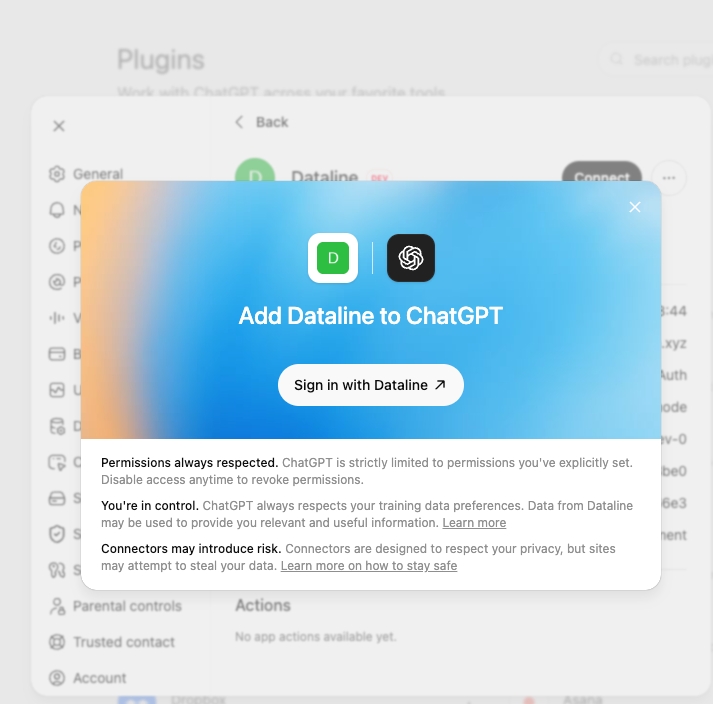
After creating the plugin, open Dataline and select Sign in with Dataline. Review ChatGPT's connector notice, complete Dataline sign-in, and return to ChatGPT. You can revoke access later from ChatGPT settings.
Ask your first data question
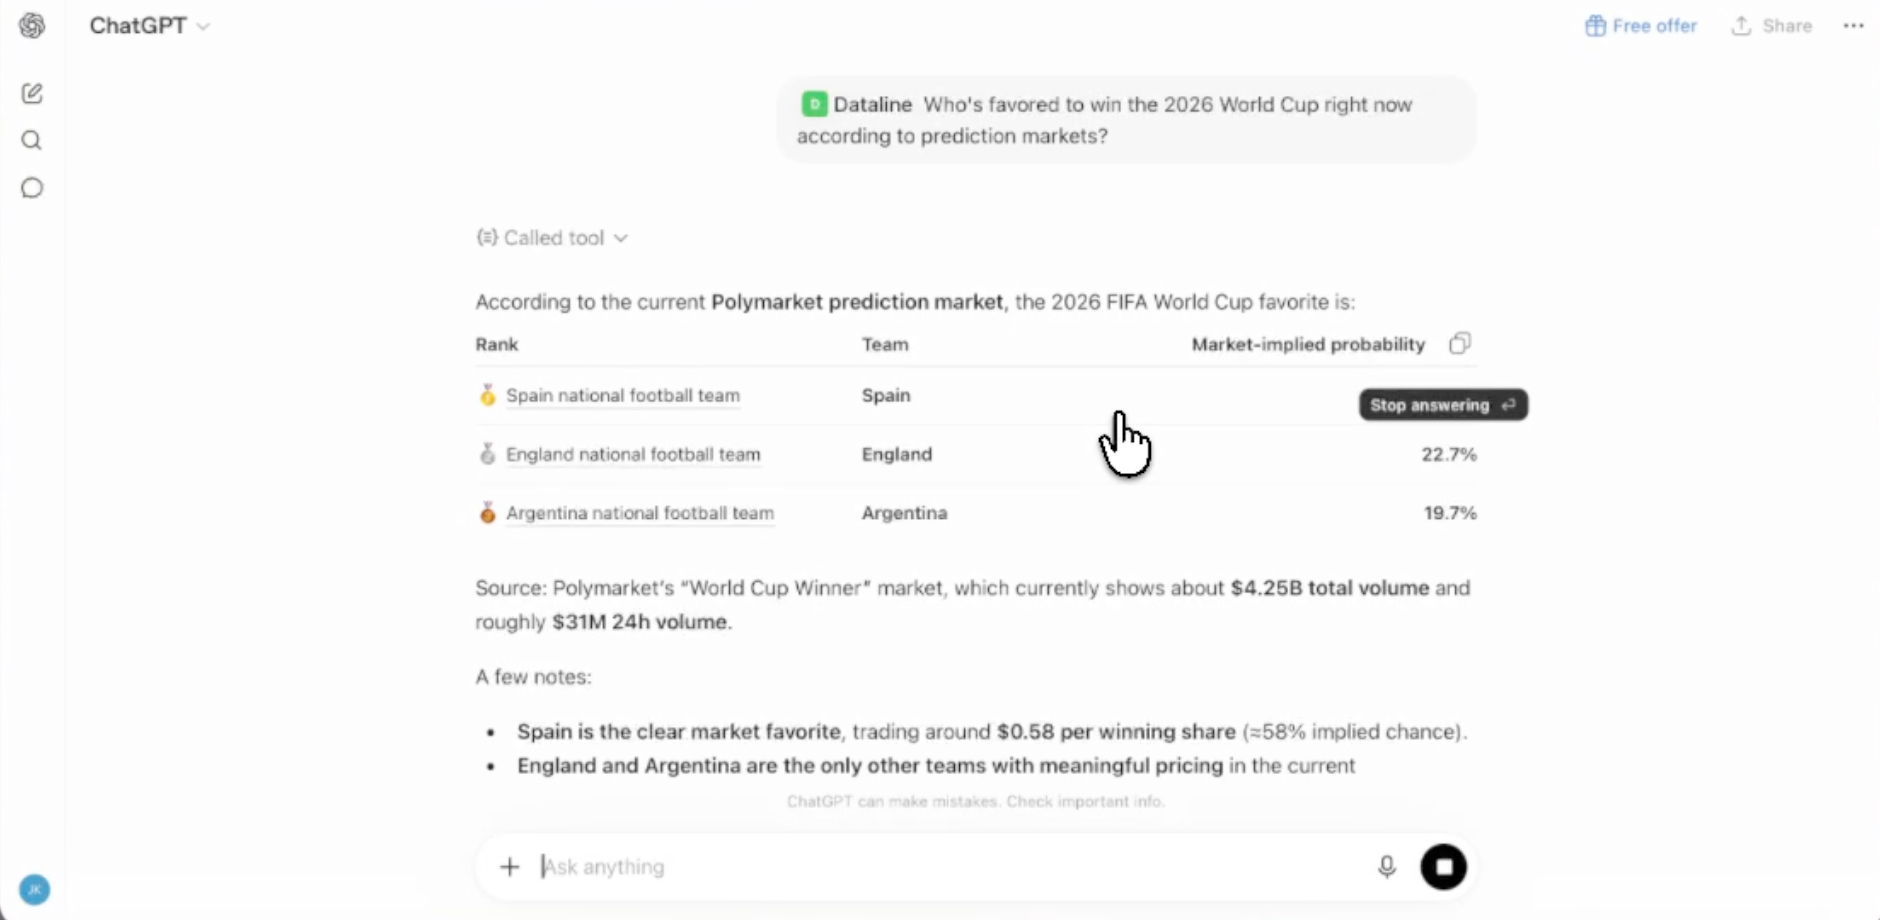
Start a new chat, enable Dataline for the conversation, and ask for current data. ChatGPT will show when it calls a Dataline tool.
These examples request information only. They do not ask ChatGPT to trade or perform an onchain action.
What is the current price and 24-hour change for ETH? Include the data source.
Compare Base network activity over the last seven days and summarize the main change.
Who's favored to win the 2026 World Cup according to prediction markets?
A concise price snapshot with the 24-hour move and a source you can inspect.
Early access
Connect Dataline using the access available to your account. Available features and usage limits depend on your current access policy while public pricing and packages are being finalized.
View plan detailsPrivacy & security